|
From Plastic to
Profile Part Four
Messerschmitt Me 262B-1a
by Bob Aikens

available online from
Squadron
The images featured in this series were taken with an Olympus C-720
Ultra Zoom-despite it's lowly 3 MP's, it has a nice 8X optical zoom and
a myriad of other tools that are of great use in model photography.On
it's highest resolution setting it gives 1984 x1488 size images.
Once the
images are taken from the camera into it's own software programme 'Camedia
MasterPro', They are then "dragged and dropped" into Adobe PhotoShop 7
at their full resoultion, in order to have the maximum amount of
'information/pixils' to work with; the more 'dense' the information, the
more able you are to use the 'zoom-in' function as an aid in
manipulating minute bits of the image.
In a given photo suite it always seemed appropriate to include a profile
of the model aircraft, so I began to experiment, trying to find the
optimum camera settings for this. I discovered that for the type of
models depicted in this article (1/48 WW II size), a focal lenght of
between 100-120 mm produced a profile shot with the least amount of 'curvature'.This
curvature is most apparent at the vertical panel lines and/or larger
markings on the model.Further 'straightening' of the image can be done
with the 'Distortion' feature in the Camedia programme, and/or with the
'sphereize-pinch' tools in PhotoShop. In any case, the offending curved
panel lines can be removed using either the 'brush' tool or the 'clone
stamp' tool. With the help of reference drawings or the model
instruction sheet, you can 'rescribe' every panel line if need be, using
the 'line tool'. This is basically the way I proceeded in the
'rebuilding' of these images.
Also, depending upon the sheen of the model, curved area highlights will
be more or less seen. If you choose, these can be augmented using the
'brush' tool in it's varying airbrushing /feathering capacities.Lots of
fun- and if you foul up, just step backward and try again- much more
forgiving than real paint!
So on to the models/images themselves. I'll include a brief description
of what was done to each image.
Part Three - Dragon Me 262B-1a/U1
Since I hadn't really
got an accurate color scheme on the original model to begin with almost
all the mottling was redone with references from Bunrin-Do's Famous
Airplanes of the World Vol. 2 Me262-there are six photos of the
Burg-based 10/NJG 11 B-1a/U1's, some before and after capture. They are
'small white 305 and 306', Red 10, Red 12, and what may be 'small red
8'.
.jpg)
I "redid' my original
application of Graugrun and chose a Grauviolett from the color
palette-these I applied using the somewhat grainly shot of 111980. Since
building this model I have noticed several builds, including one by our
editor that have the wing uppers in a solid green hue. I have no
references to the upper wing areas, so I may have a faulty rendering of
the wing uppers in the flying shot.
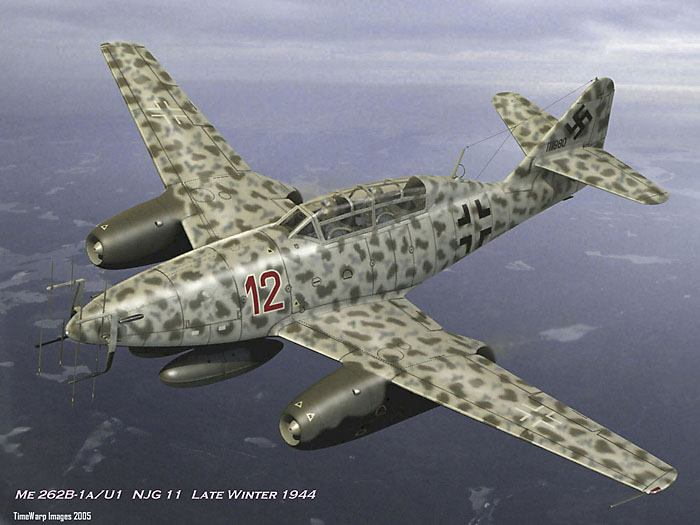
Flying shot of 'Red 12' (title image)
Almost every square centimetre of this
image was redone-the nose paneling was corrected and re-done; the wing
and fuselage mottling; a pilot and radar man were added and
appropriately 'painted', and highlighting done on the rounded portions
of the fuselage , wings and nacelles. It was quite fascinating to watch
the image become more than the sum of its parts. Strange stuff, this
digital imaging!
Model, Images and Text
Copyright © 2005 by
Bob Aikens
Page Created 09 May, 2005
Last Updated
09 May, 2005
Back to
HyperScale Main Page |
 Home |
What's New |
Features |
Gallery |
Reviews |
Reference |
Forum |
Search
Home |
What's New |
Features |
Gallery |
Reviews |
Reference |
Forum |
Search